Publish to Web
The Web Player allows anyone to explore your Mental Canvas scenes interactively from any device, including phones, tablets, computers, and VR headsets. Web scenes can be embedded on websites, viewed in virtual reality, and navigated freely for an immersive experience.
How the Web Player Works
The Web Player presents your scene as a full-page interactive experience in the browser, like this example. It can also be embedded on any website using a simple iFrame.
In the player, viewers can interact with your scene in several ways:
- Freehand Navigation: Pan, zoom, and rotate through the scene.
- Bookmark Navigation: Use the Next and Previous buttons to step through bookmarks.
- Playback Mode: Hit play to watch a sequential flythrough of the bookmarks.
- Interactive Links: If your scene includes links, viewers can click on canvases to navigate to external websites or other bookmarks for nonlinear storytelling.
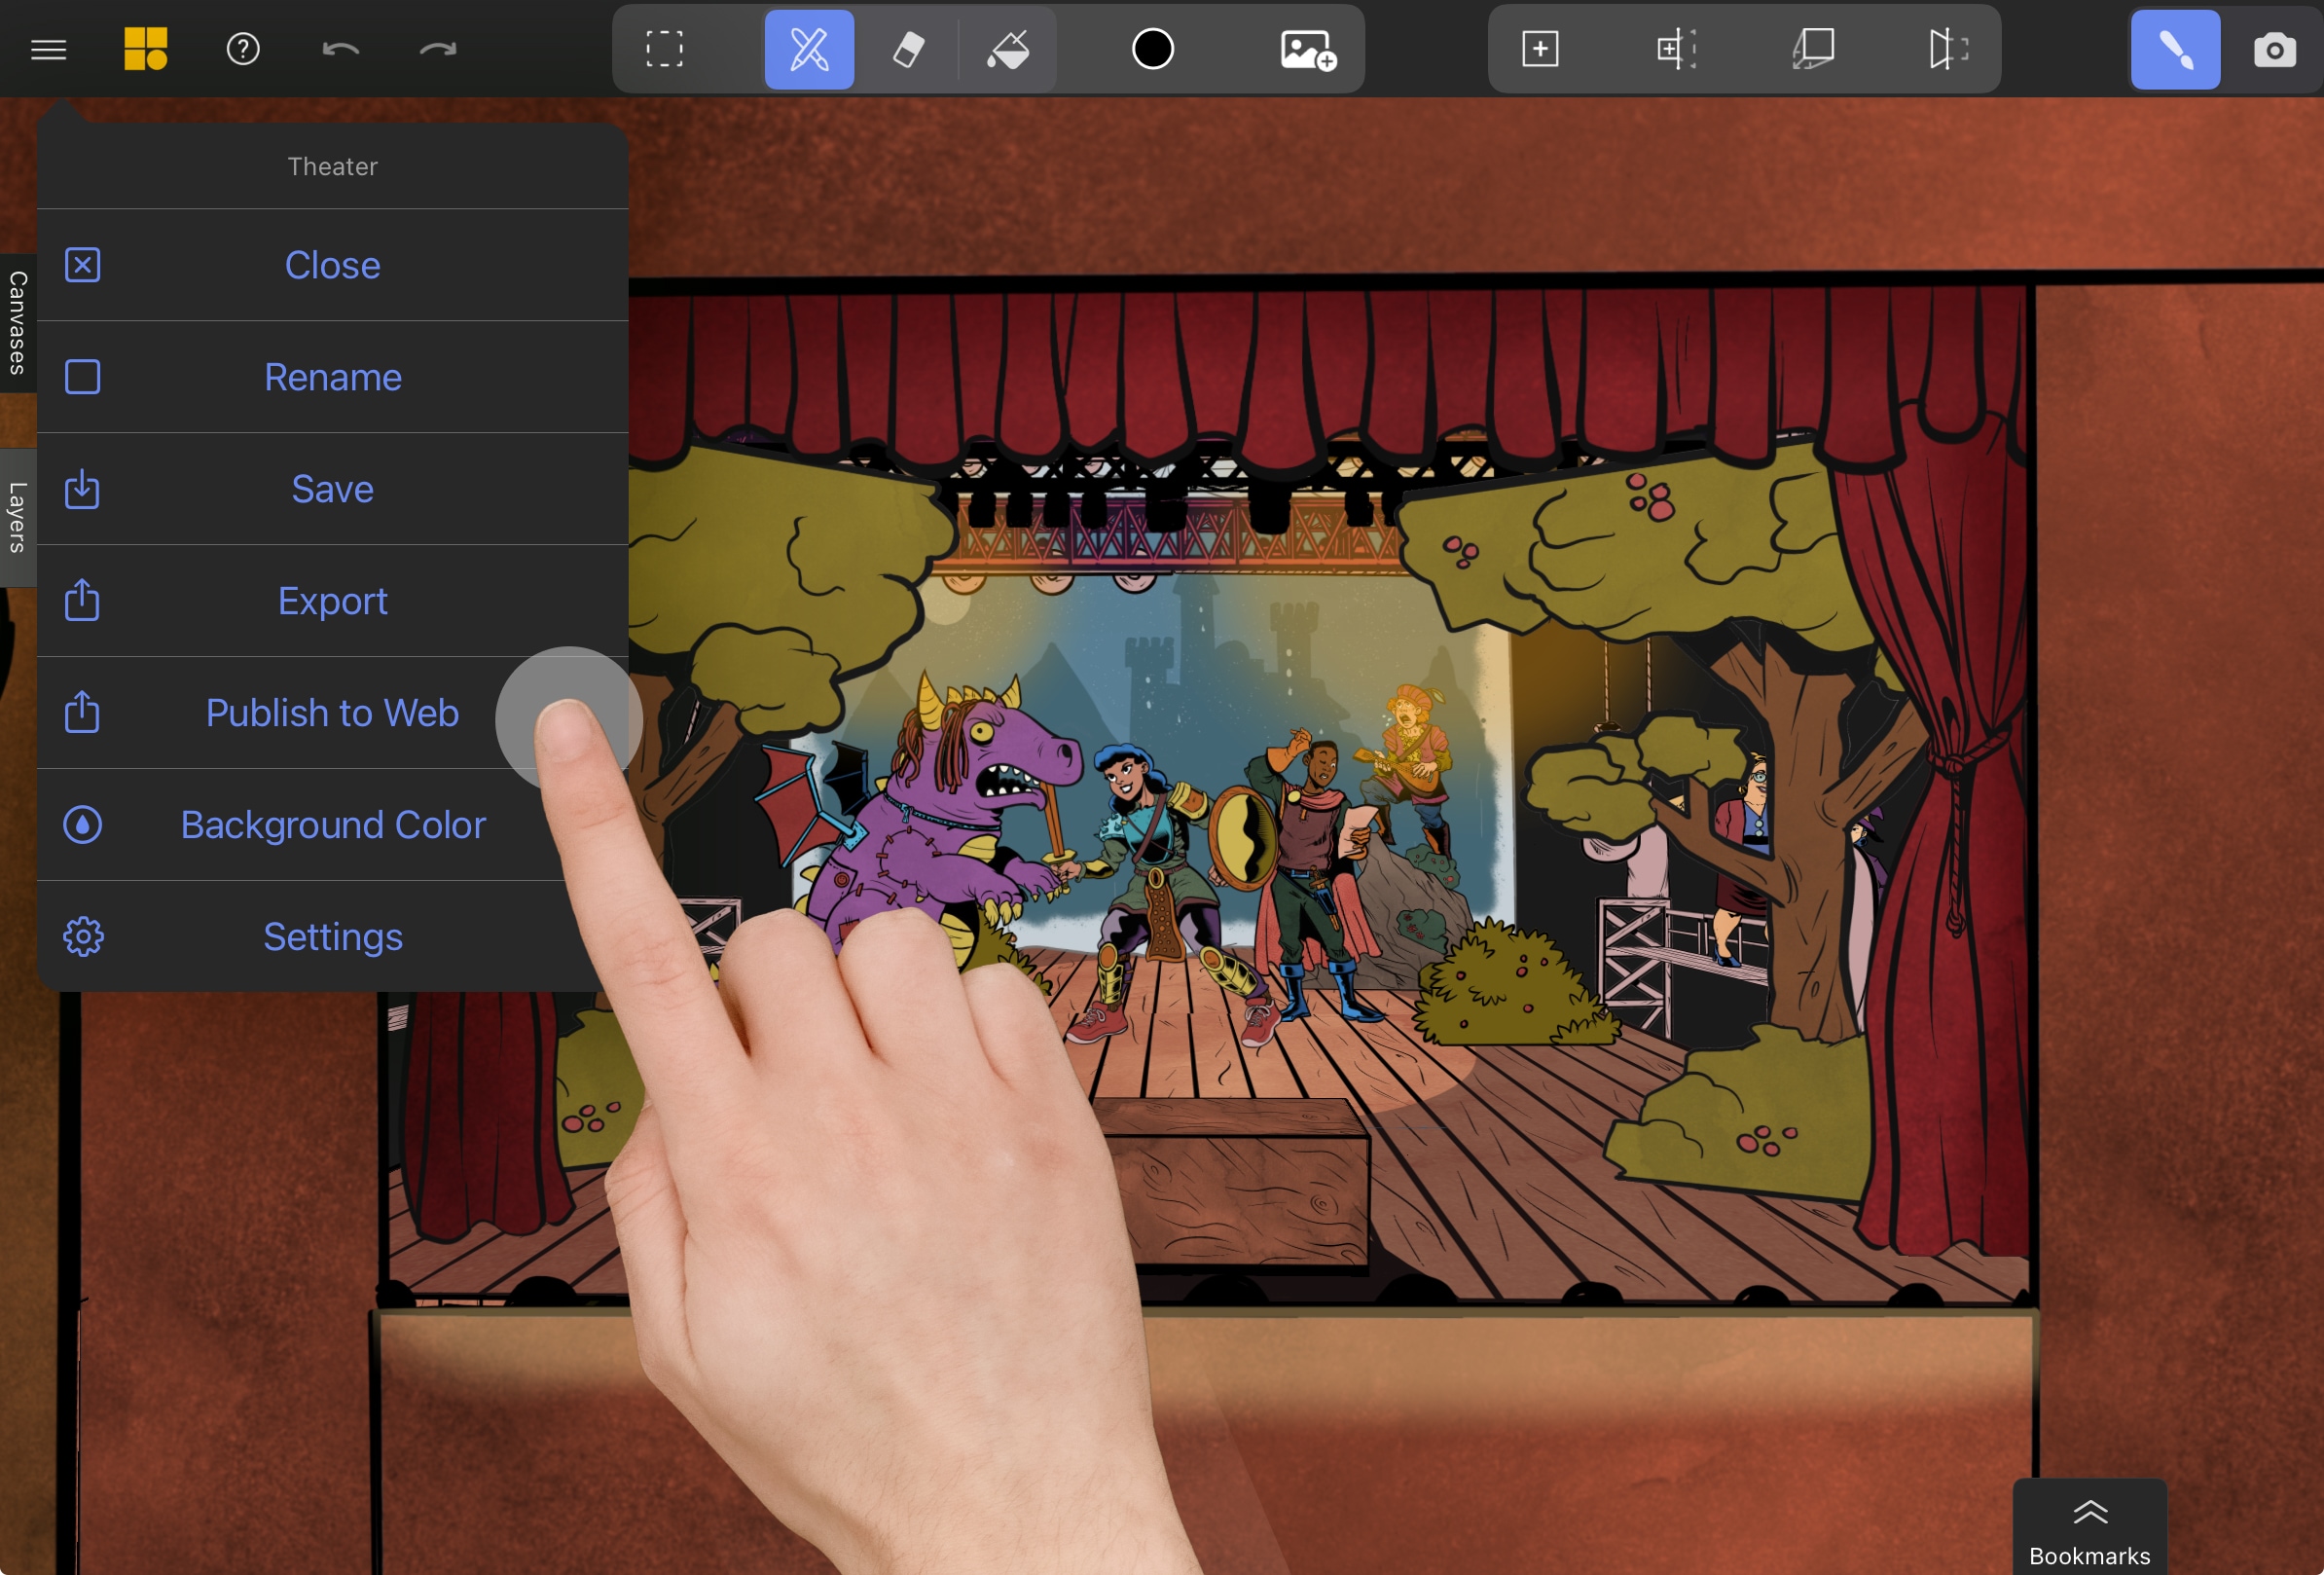
Publishing Your Scene to the Web
Create Your Scene
Complete your scene in Mental Canvas, ensuring that bookmarks and other details are ready for sharing.
Open the Publish Menu
Open the Options Menu and select Publish to Web.
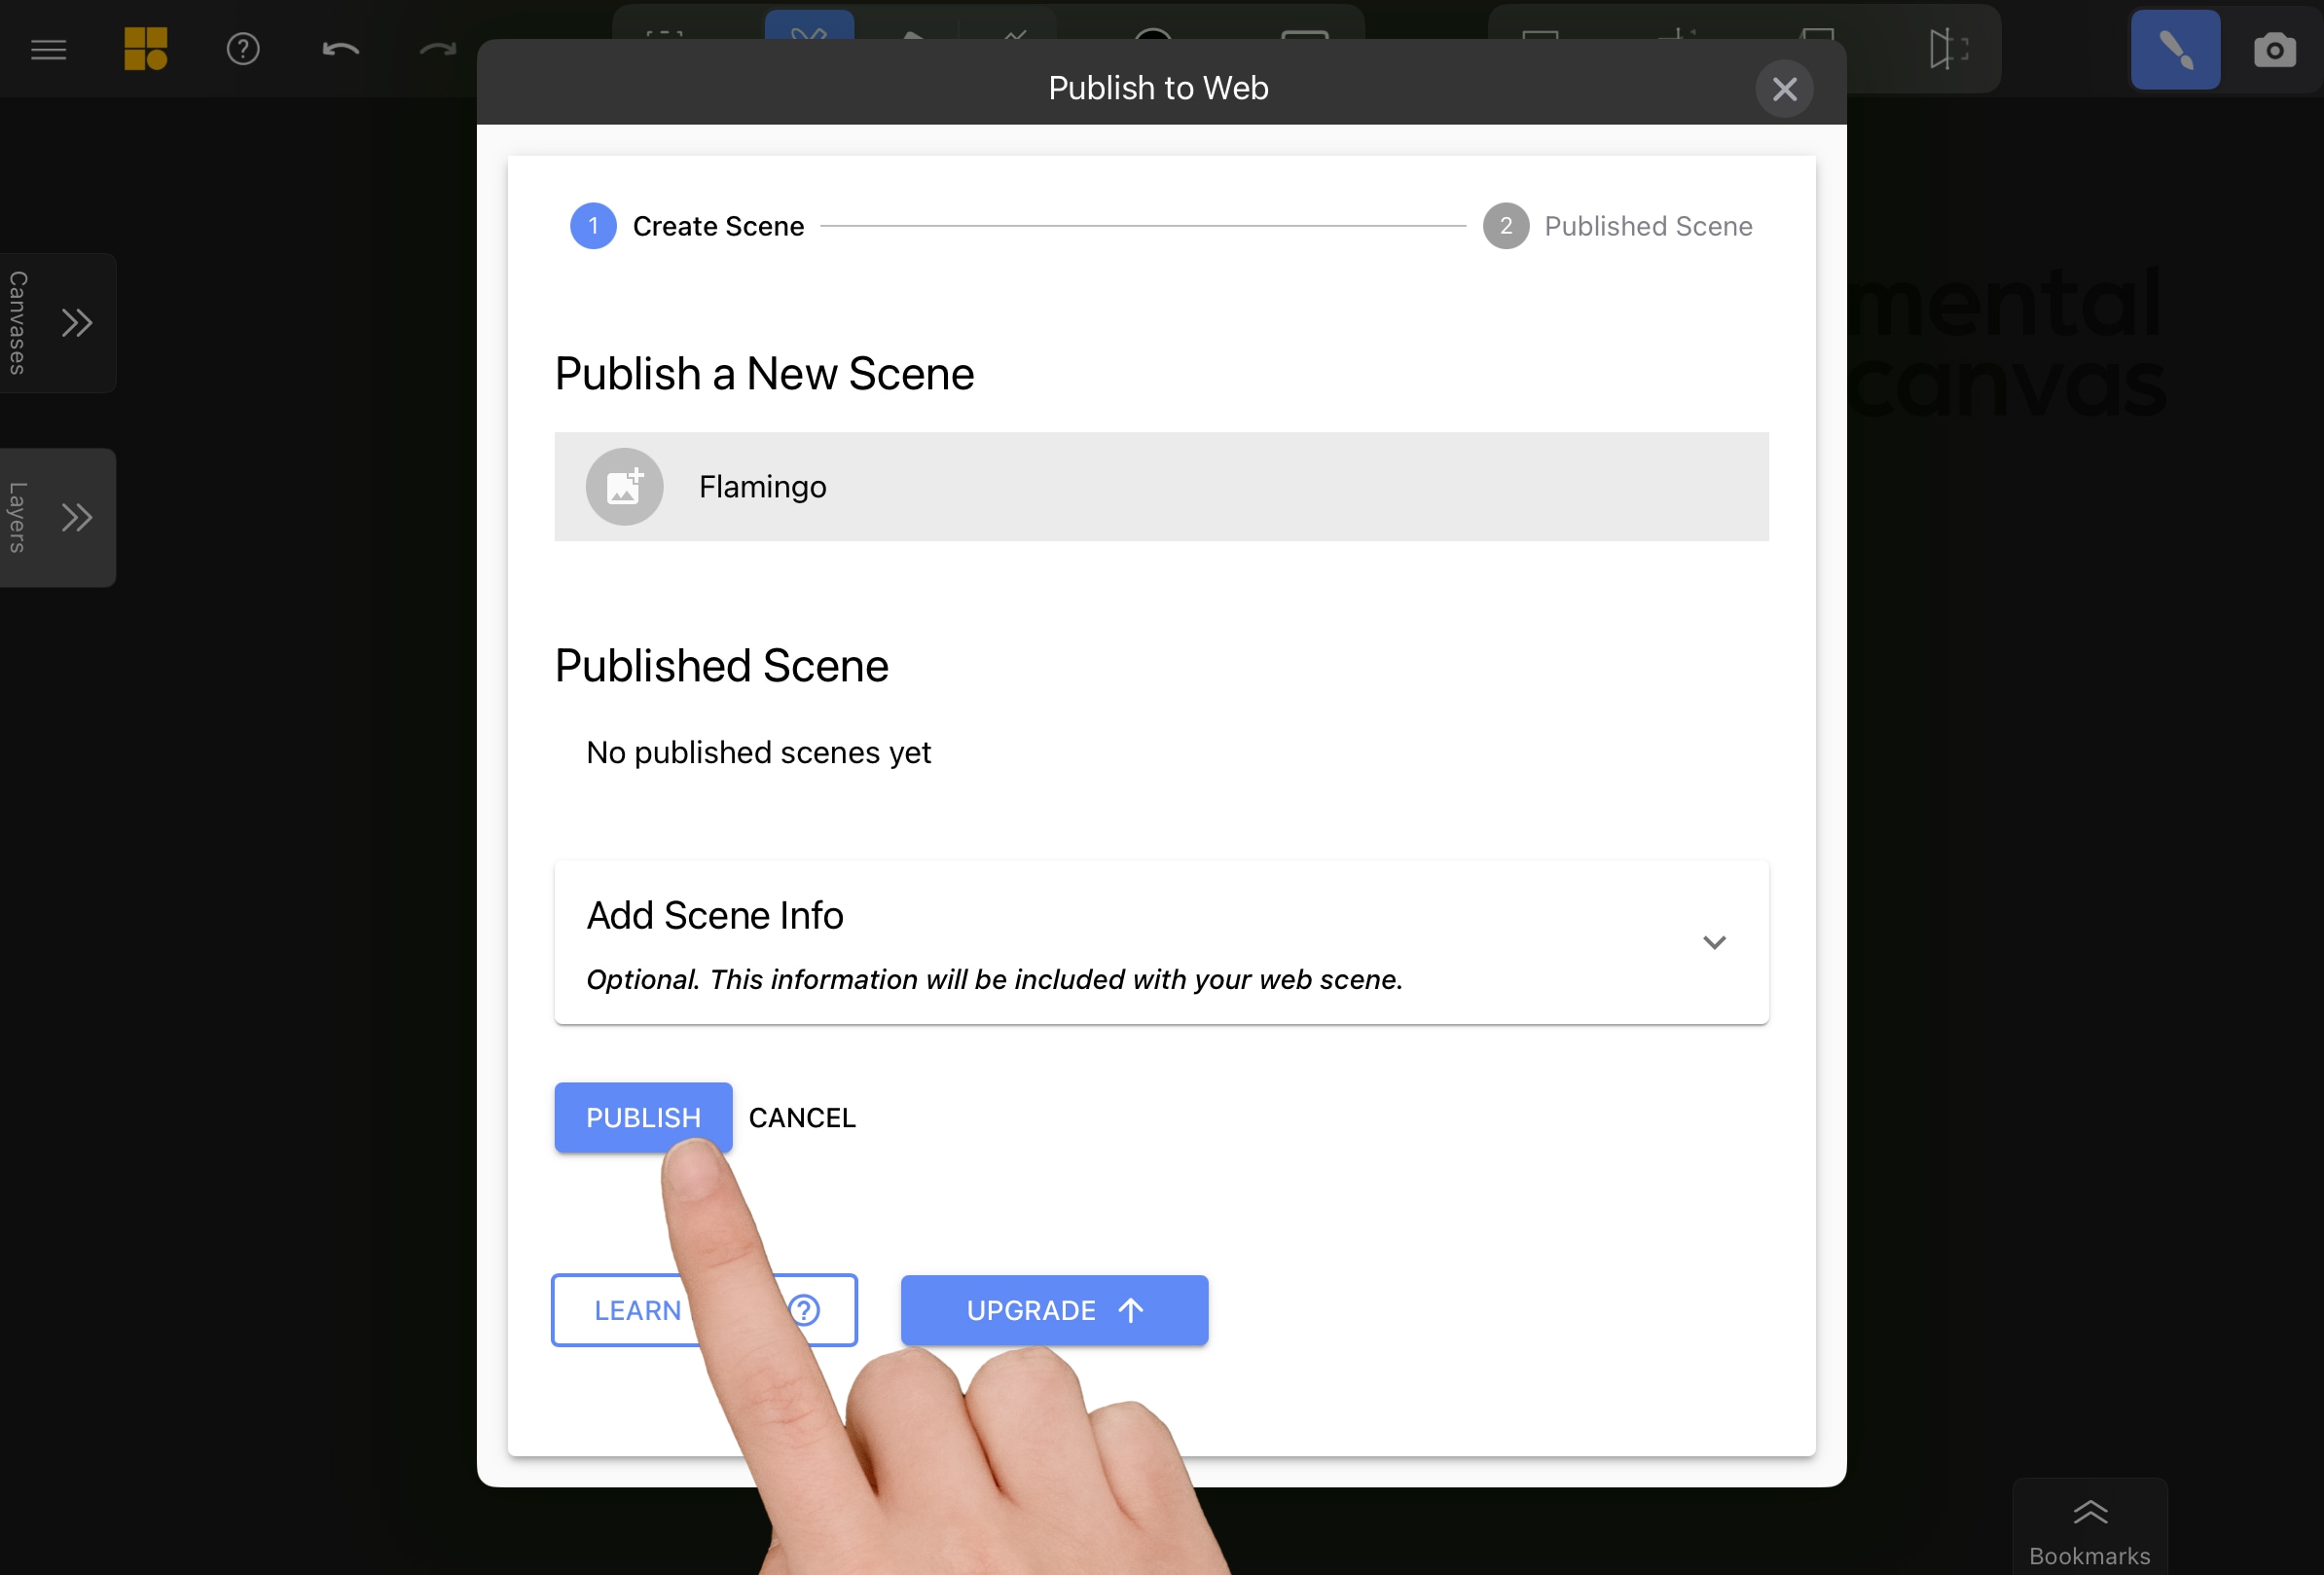
Name Your Scene
Enter a name for your scene in the designated field at the top.
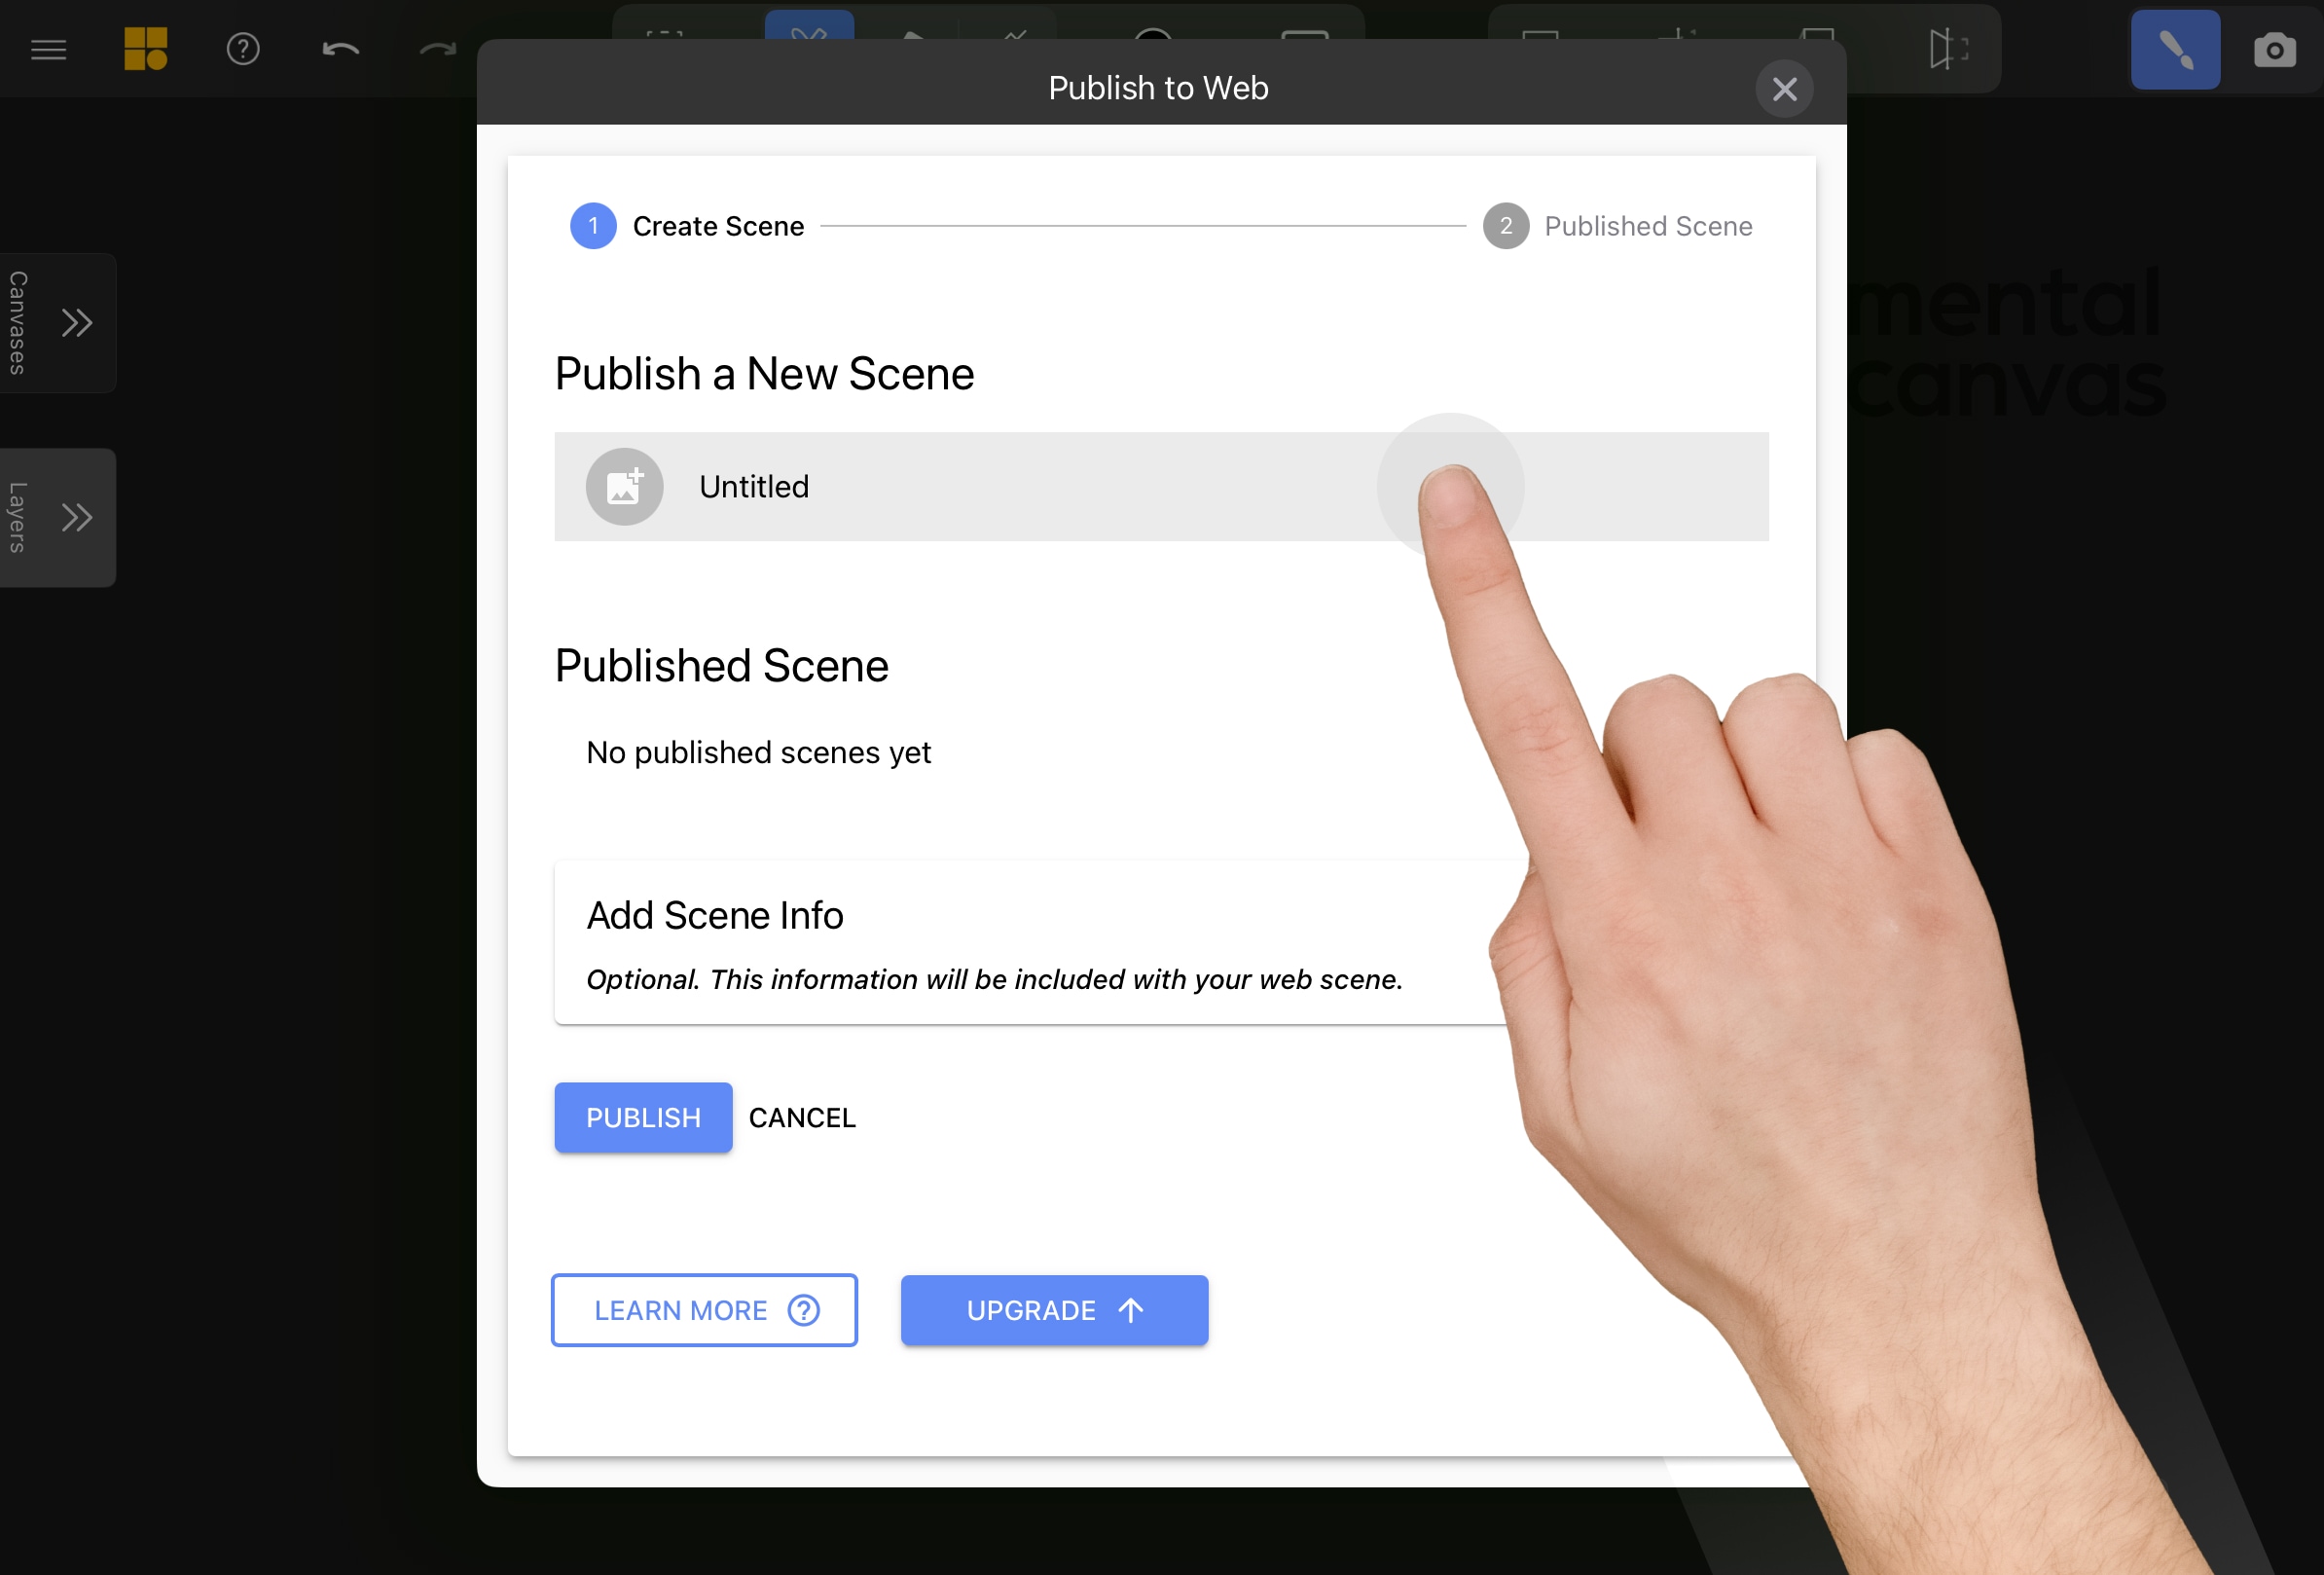
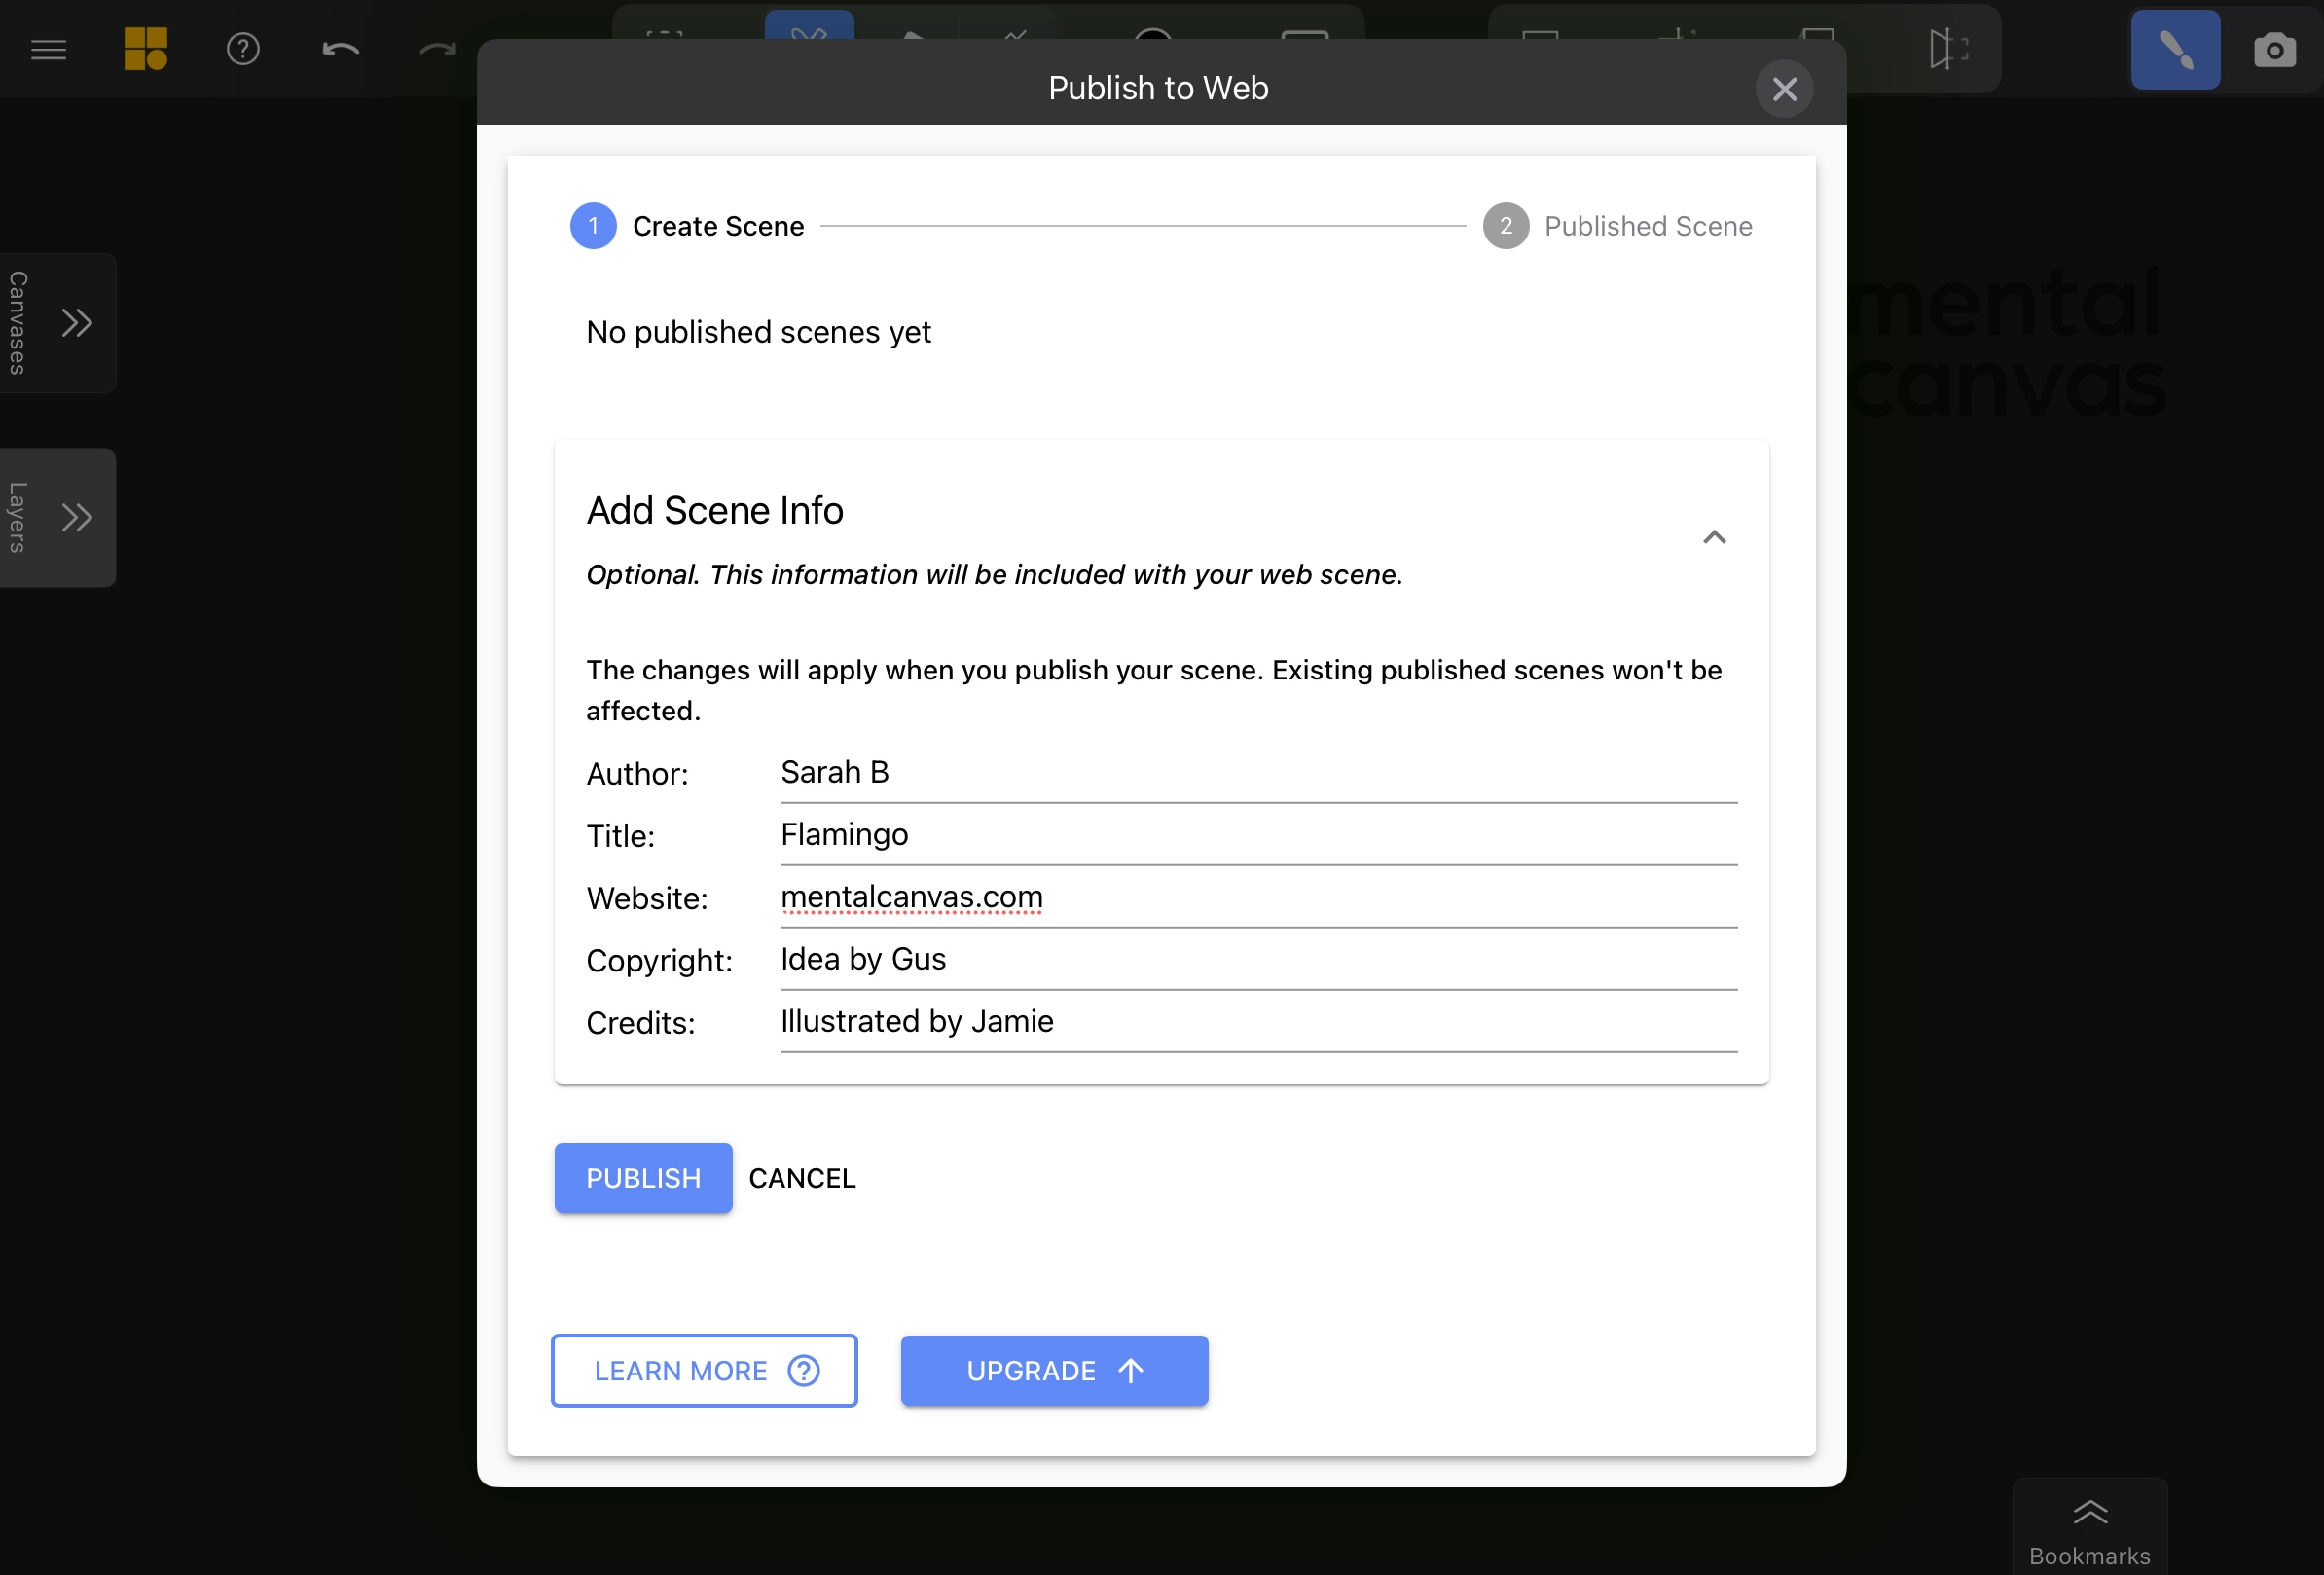
Add Author Name and Credits
Expand the Add Scene Info menu to input optional details like author name and asset credits.
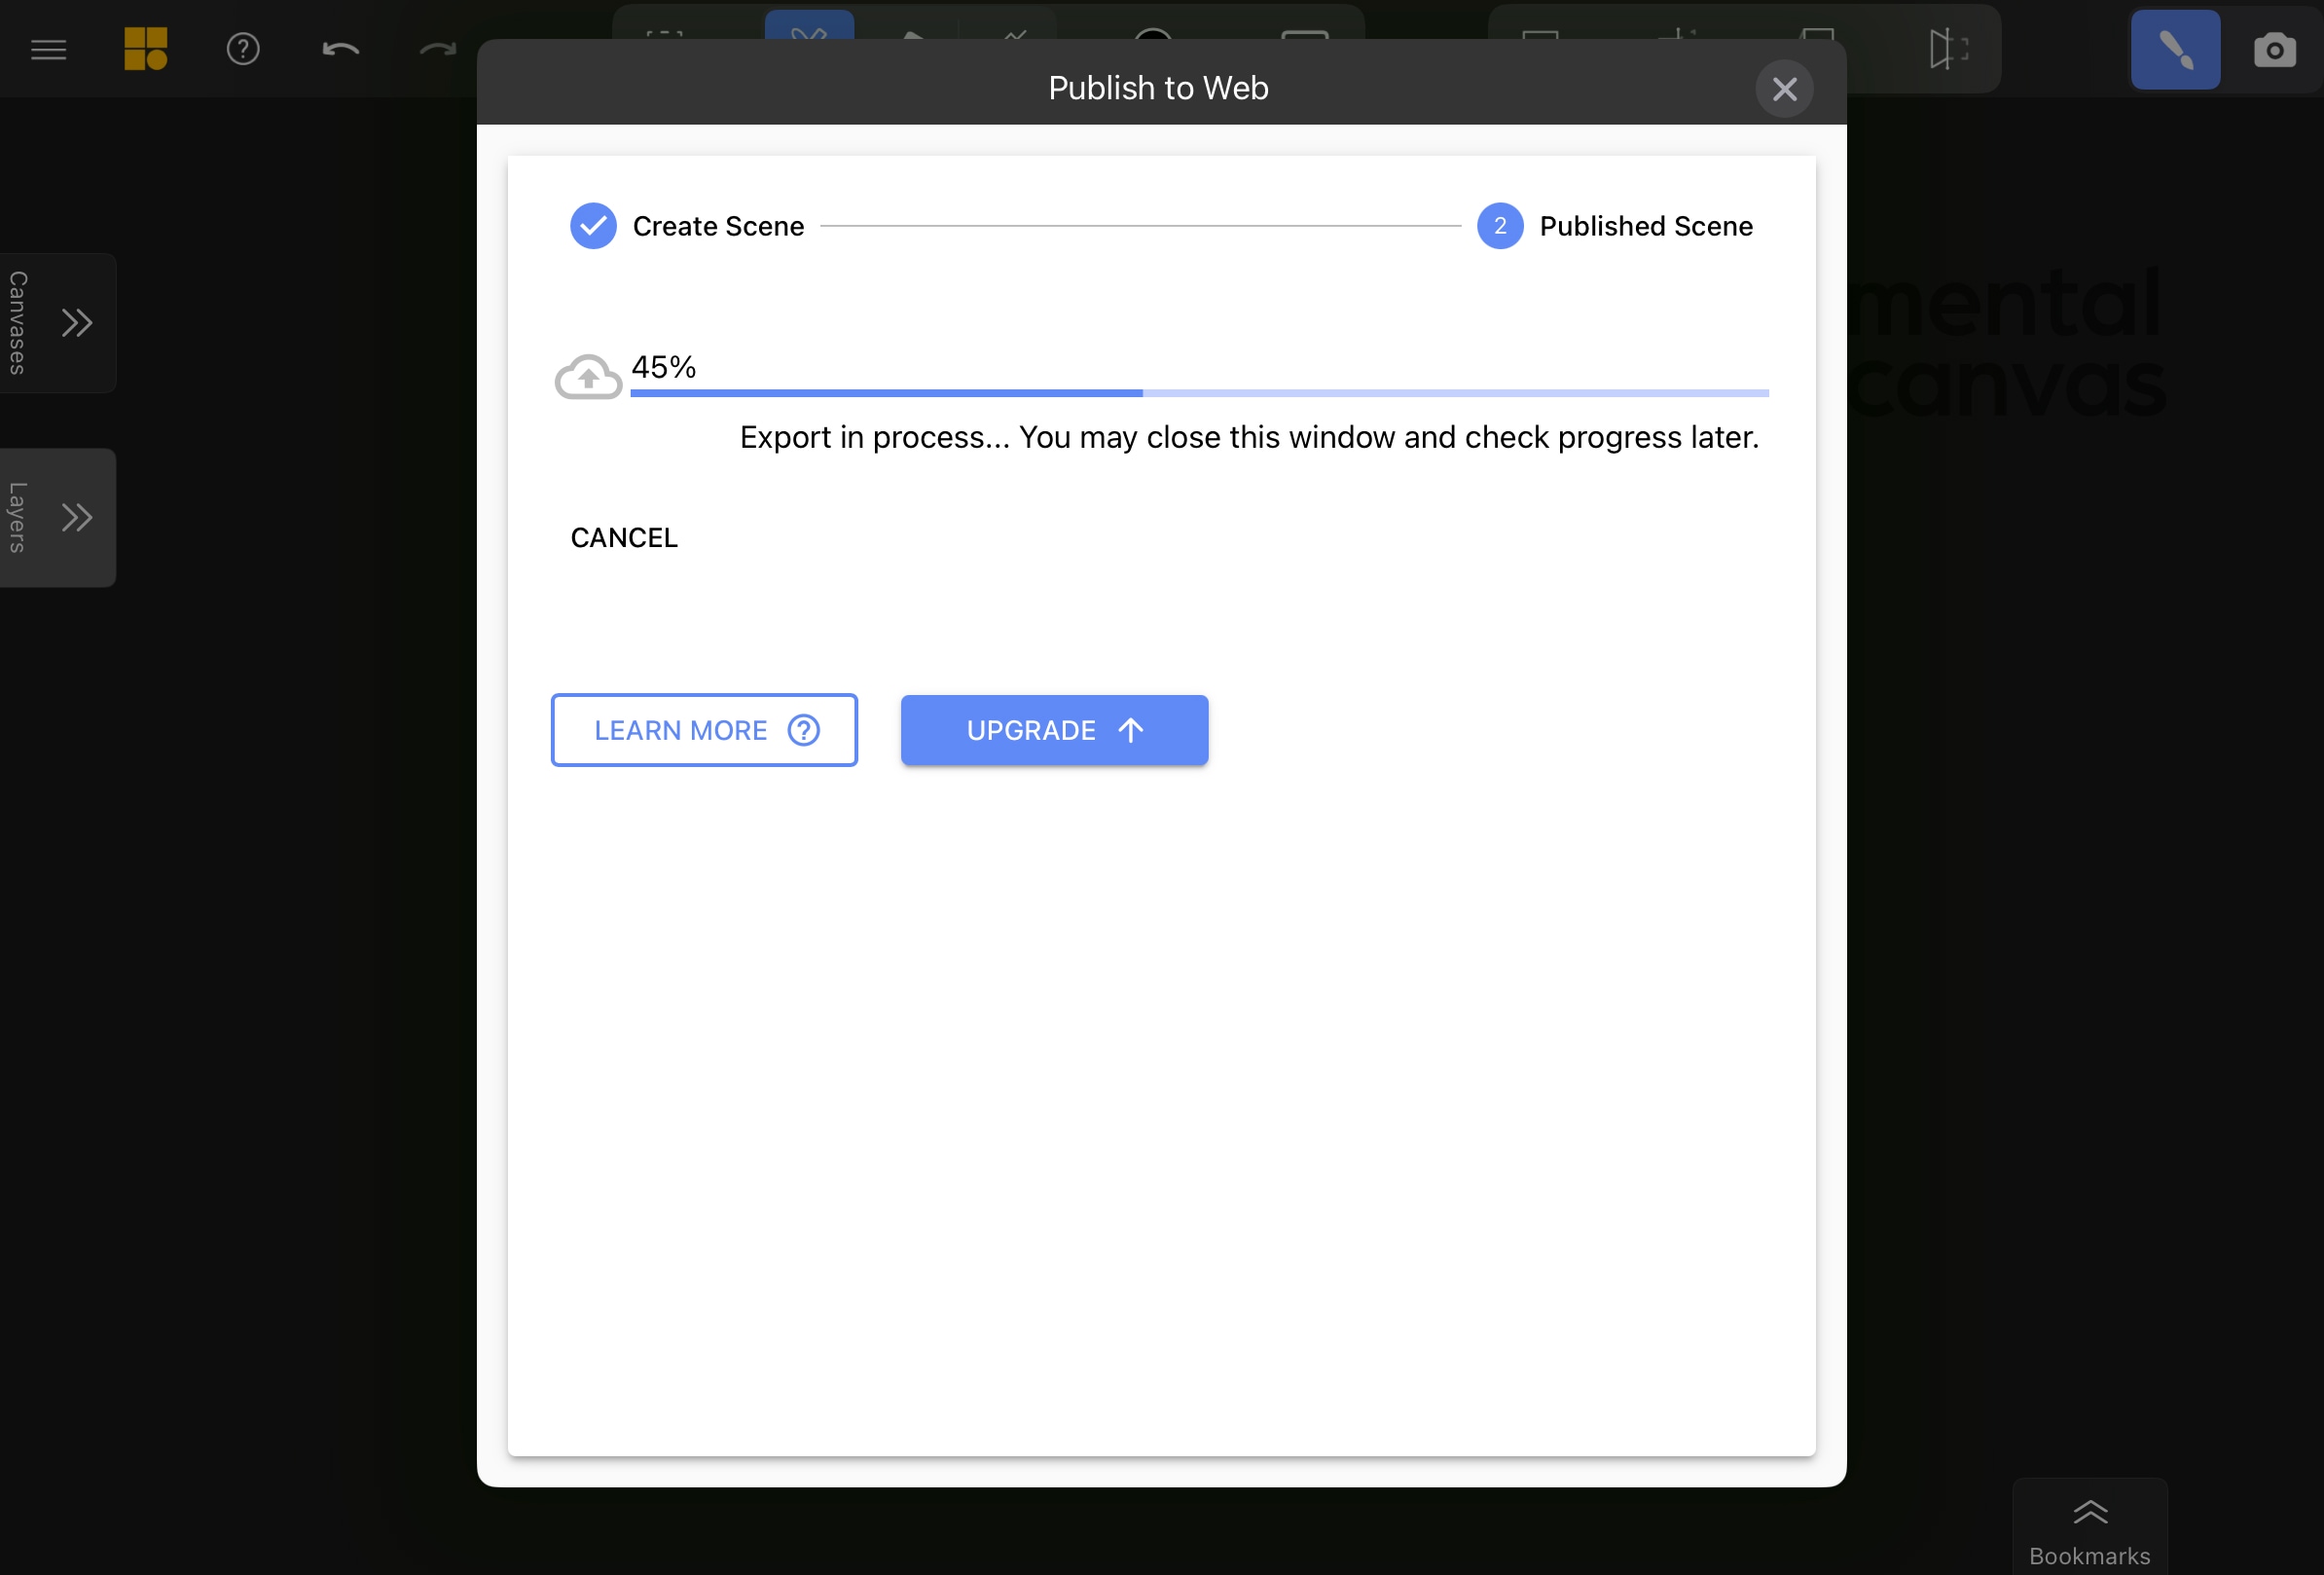
Publish
Tap Publish to begin the upload process. Ensure you have a stable internet connection.
Wait for Export
The first step of the export occurs locally – avoid closing the app during this stage. The subsequent server processing step may take a few minutes.
View and Share Your Scene
Once publishing is complete, tap View in Browser to preview your scene or Copy Link to share it.
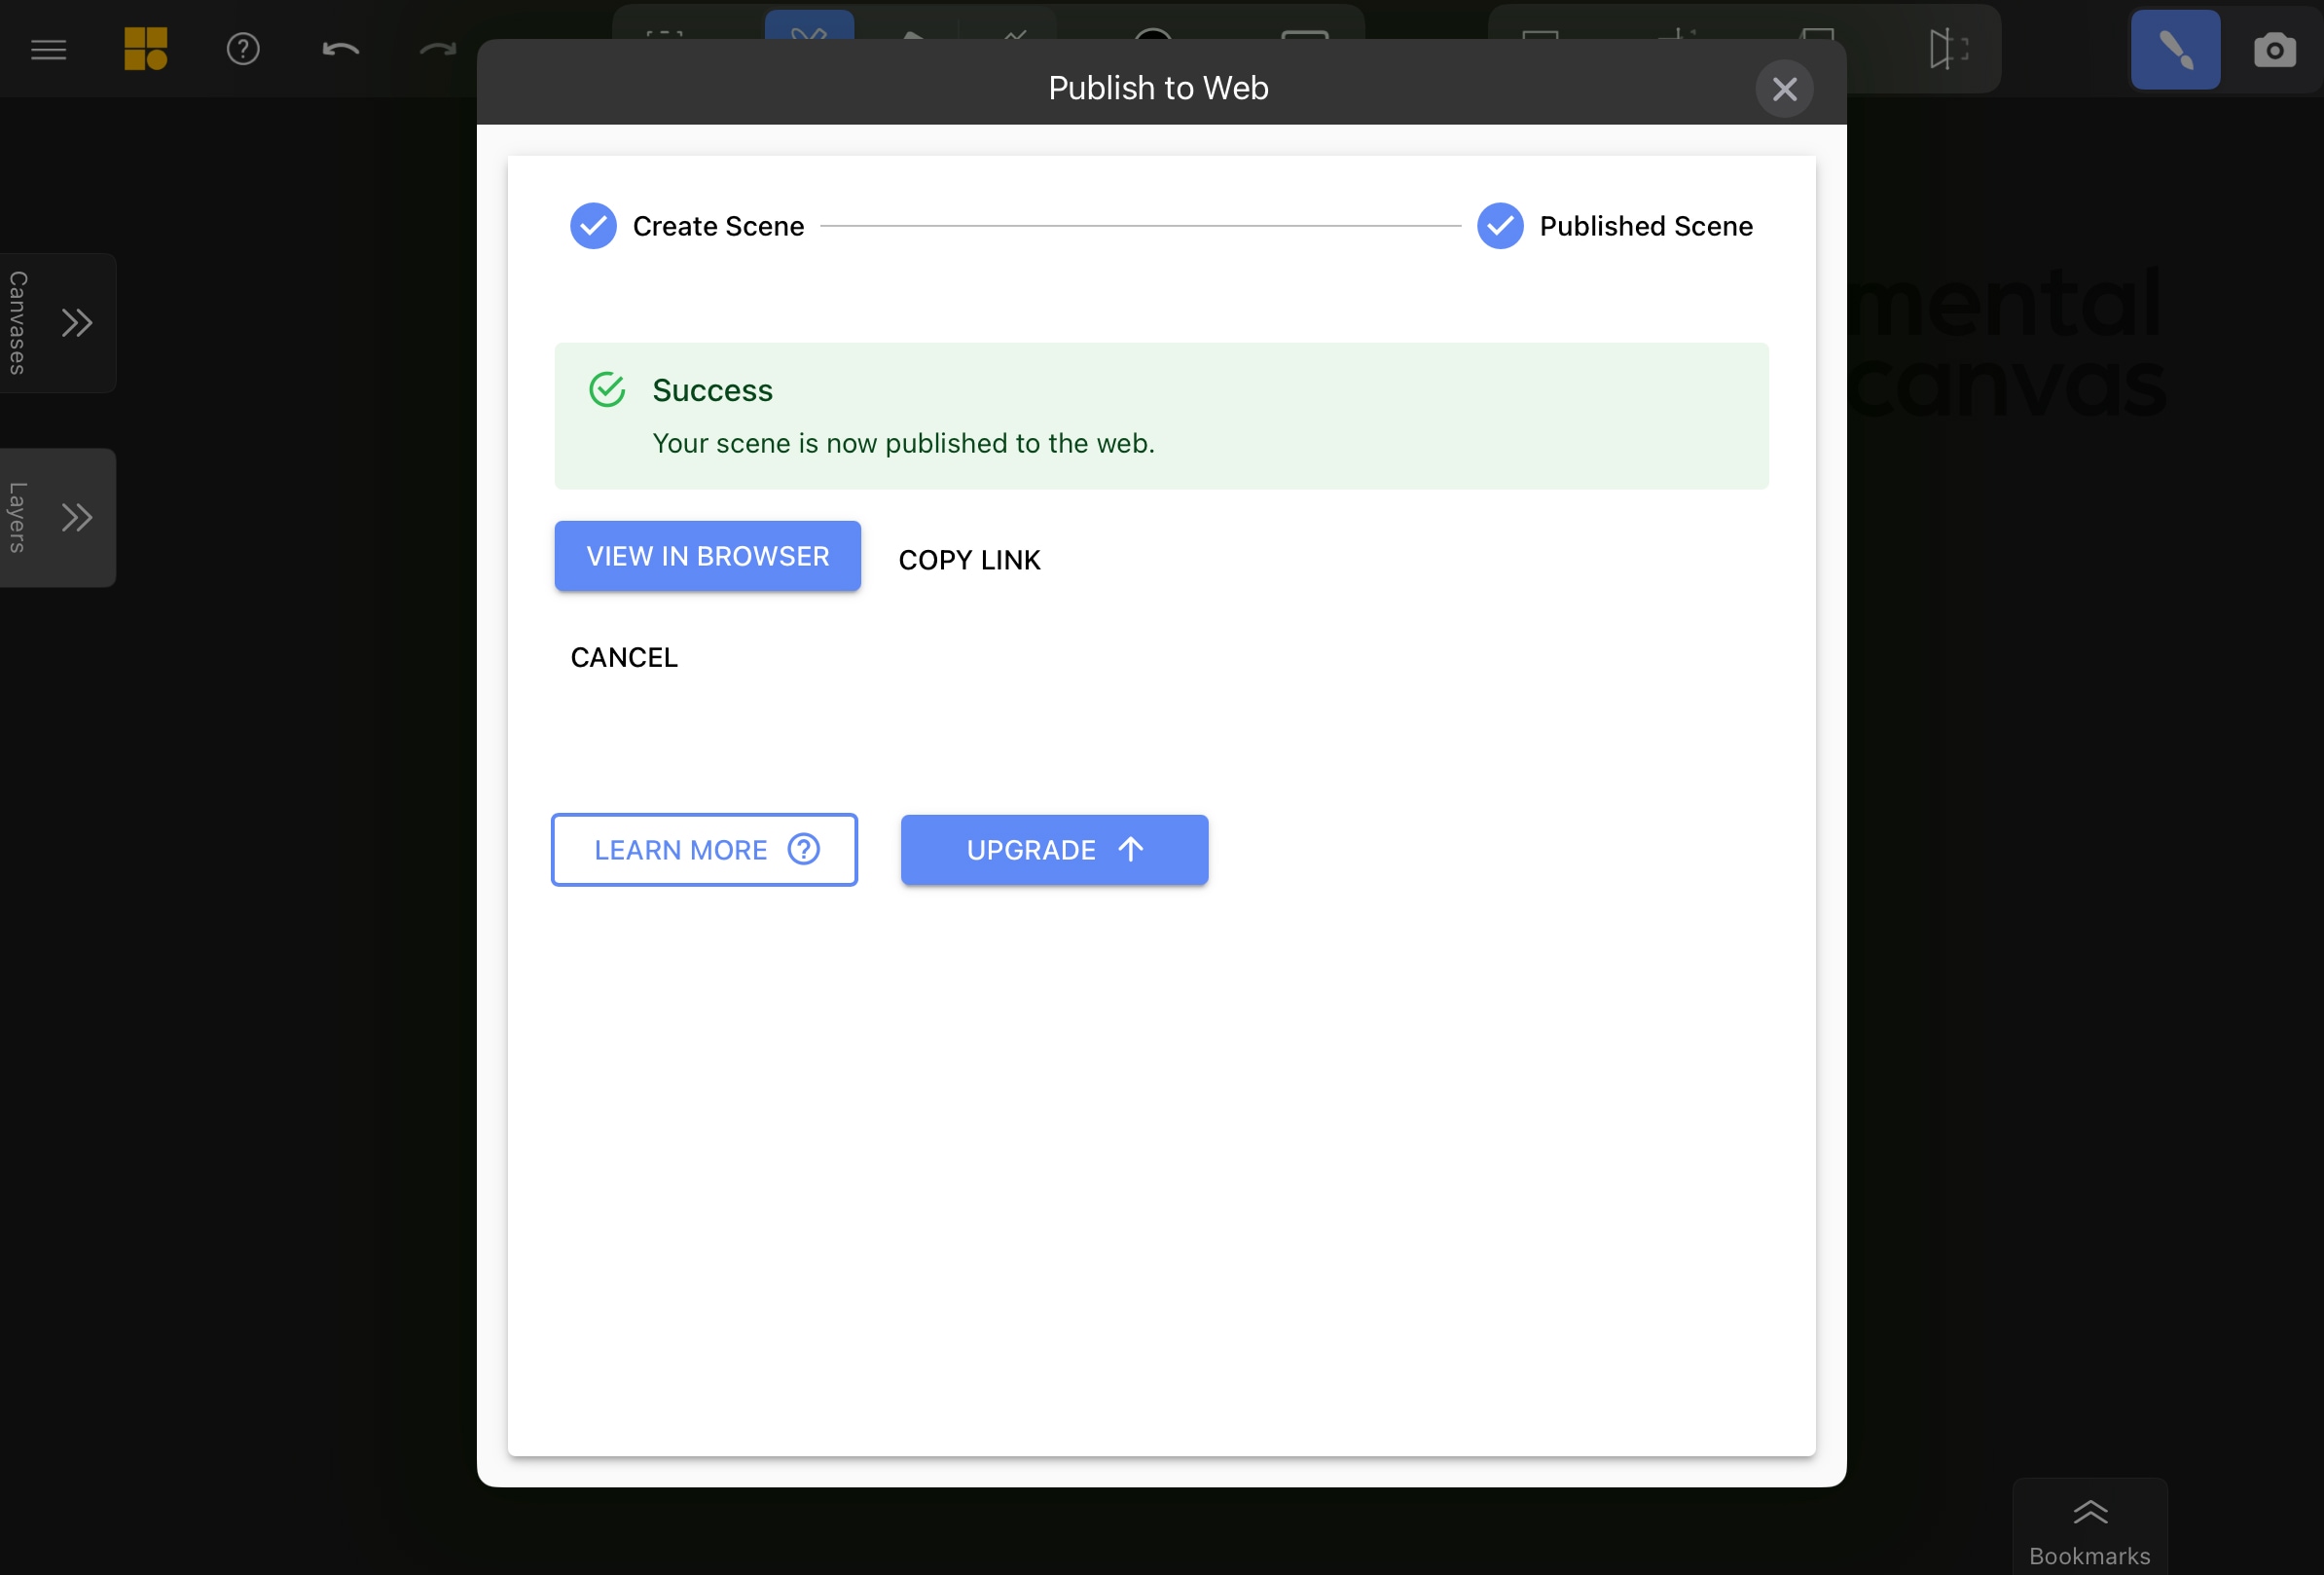
Your web scene’s URL will follow this format: mentalcanvas.net/xxxxxxxxxxx. Anyone with the link can open and explore your scene on any web-enabled device.
Heavier Mental Canvas scenes – with many strokes, large images, or complex geometry – may not perform optimally in the Web Player due to technological limitations.
Who Can Publish to the Web
Your publishing capabilities depend on your Mental Canvas plan. For a full pricing comparison, see our Pricing.
Manage your Published Scenes
Once you’ve published web scenes, you can manage them via the Publish to Web menu.
For Free plan users, only one scene can be live at a time. The menu will show how much time remains before the scene expires. Publishing a new scene will replace the existing one and generate a new link.
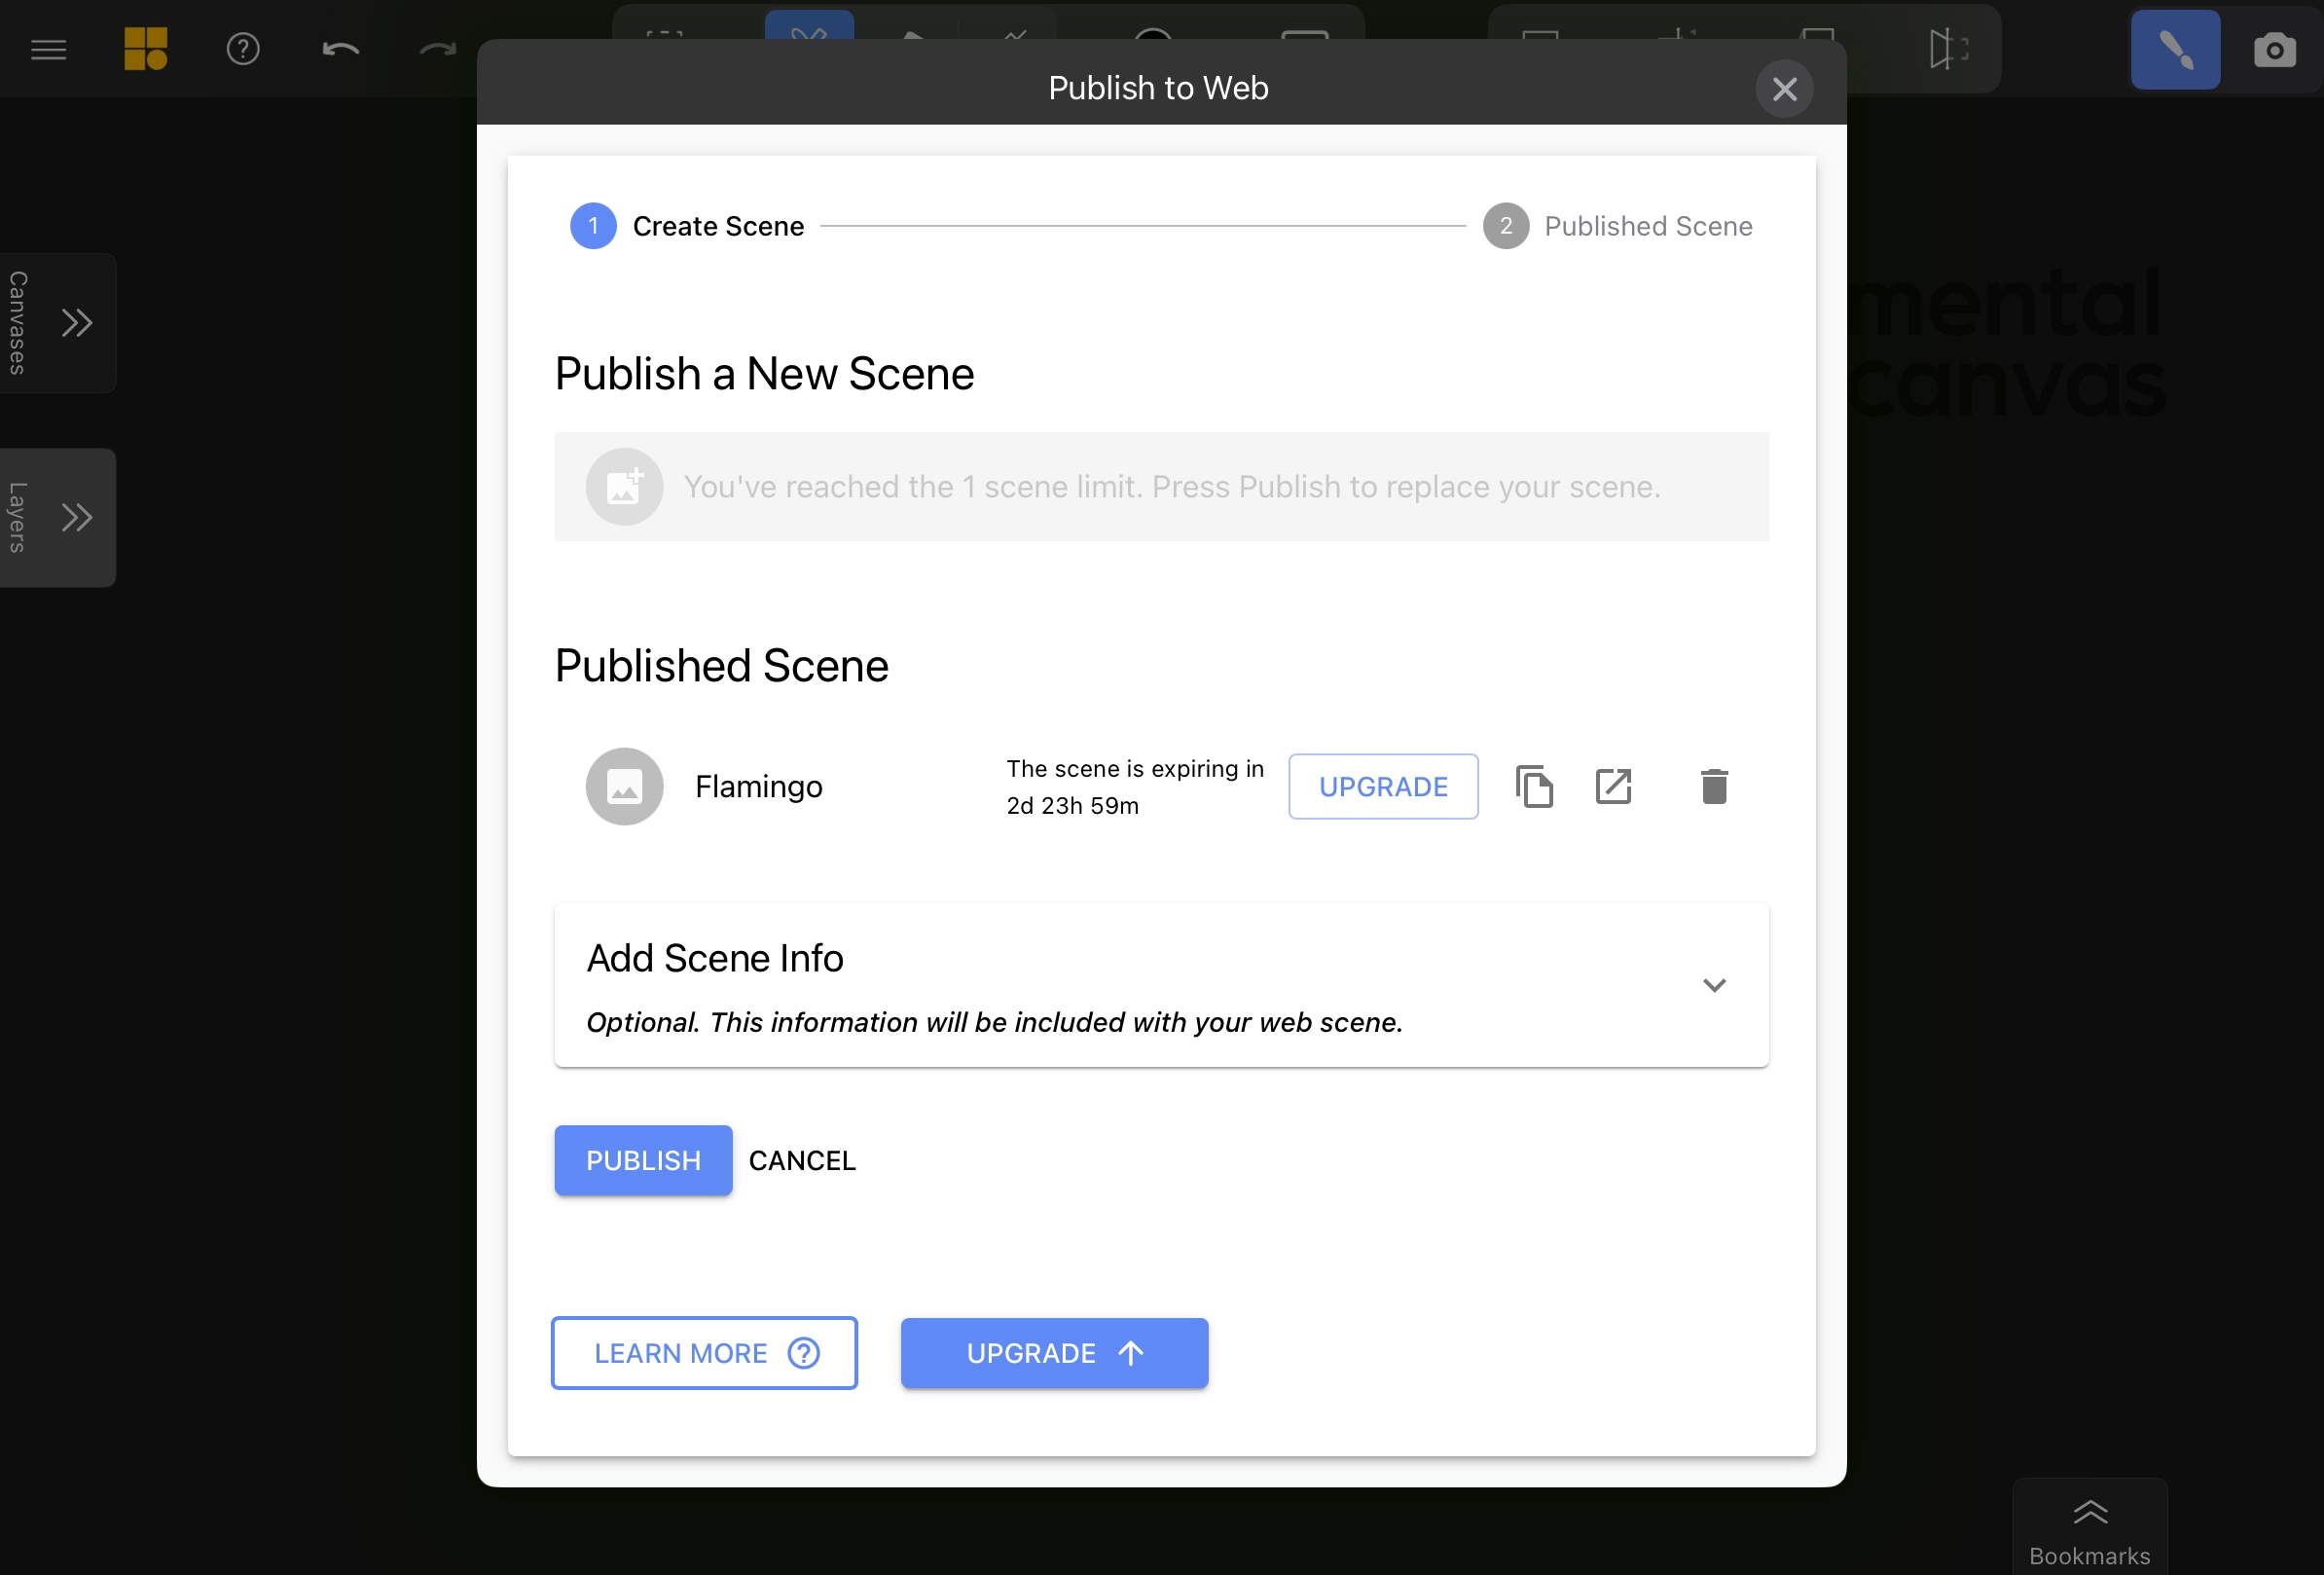
For Pro and Premium users, you can publish new scenes without overwriting existing ones. You can also update or delete previously published scenes.